Unleaded Golf Club

 |
| Replica putter, left. Tom Morris putter, circa 1870, right, with weights in rear of club. |
ADDING LEAD WEIGHT TO A 19th CENTURY LONG NOSE GOLF CLUB
 |
| The "lead" weight on this modern replica is actually a mixture of bismuth and tin instead of the traditional lead. |
Clubmakers added weight to the club by pouring in molten lead into a cavity in the back of the club. A simple trough would not have any mechanism to prevent the lead from dislodging, so it was held in place by one of two methods. One method was to have intersecting holes drilled beyond the main cavity to retain the lead.
Another method was to drill holes obliquely that were then tapped with a screw, with the thread pattern retaining the lead.
In Horace Hutchinson's 1899 The Book of Golf and Golfers, J. H. Taylor describes the process in great detail:


 |
| Outline drawn |
 |
| Saw the straight part of the edges |
 |
| Edges sawn. Ready for gouge |
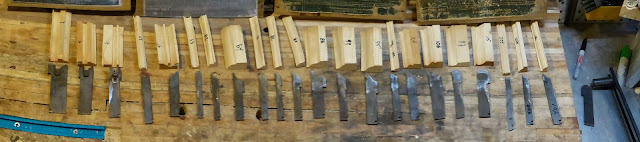
Gouging Out the Groove

Because the density of the bismuth and tin alloy is less than lead, instead of a "V" cavity, I made more of a "U" to accept more molten metal. Two different clubheads are shown below. J. H. Taylor left the recommendation of the groove depth "to your judgment". On my first club, my judgment was a bit off as the club came out a bit too light.


 |
| The latest club I made has a larger groove. |
Drilling the Retaining Holes

To prevent the lead from dislodging, drill intersecting holes (rather than threaded holes) beyond the main cavity to retain the lead.

 |
| The pick in one hole can be seen through the other intersecting hole. |
 |
| X-Ray radiograph through the top and bottom of the club showing how the lead is held in place by intersecting holes into which the molten metal flows. This club has two additional holes on the edges to add more weight. X-ray diagnosis: I am a bit concerned about how close the hole closest to the neck is to the face. Upon hitting this club, the club fractured adjacent to the most central lead hole for obvious reasons. Lesson learned: Angle the lead holes away from the neck. |
Pouring the "Lead"
Now that the groove is made, we need to pour the "lead". Instead of lead for my replica clubs, I decided to use a bismuth and tin alloy (rotometals alloy 281-338F) which looks similar to lead, has a low melting point, and is safer than lead. It is also cold fusible, which means that if a void is present, more molten alloy can be added to the existing metal. The disadvantages are that it is expensive at $20 a pound, not easily removed with hand tools, and about 3/4 the weight of lead.

Clay is placed to contain the molten metal (use real clay, not Play-Doh, like I did on my first attempt unless you want a gooey mess).


| The bismuth and tin alloy is quite a bit harder than lead, so I resorted to a drum sander. Wear a respirator. |
 |
| Finished putter with metal alloy weight. |

 |
| Caddie Willie Gunn,1839 by C. H. Robertson at the Bruntsfield Links. In 1813, Daft Willie had his bedclothes stolen from his small attic bedroom for which the Company of Edinburgh Golfers donated 12 shillings to help him out. It was said that from that point on, he would wear his entire wardrobe all at once. He wore three pairs of pants, an overcoat, an old member's red coat, several vests and shirts. Fortunately for Willie, golf was played more often during the colder season when the grass was not as high. |
Illuminated letter "G" by Thomas Hodge from Golf, The Badminton Library

Comments
Post a Comment