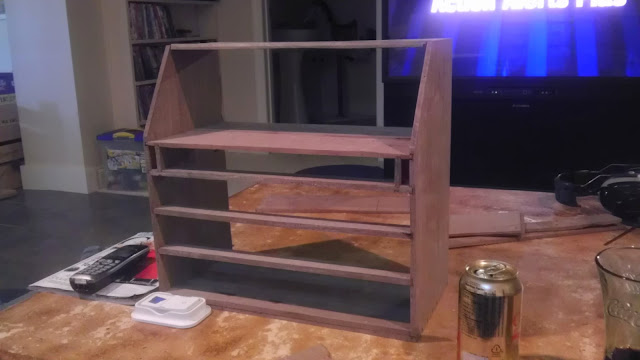
Casework for Miniature Slant Front Desk
As mentioned in the earlier post, some walnut and ash logs were collected from the neighborhood golf course. The huge "divot" to the left of the stone wall was the home of a large ash tree, while the walnut came from a felled tree on the grass mound next to the white post. These were milled down and dried in the attic for a few months.
I decided to make the miniature apprentice slant front desk from the walnut and ash because it would help me improve my amateur hand tool skills using a variety of joinery techniques: dovetails, cockbeading of drawers, sliding dovetails, mortising and string inlay.
Plans were based on Glen Huey's Illustrated Guide to Building Period Furniture. The scale was reduced by 2.54x using centimeters instead of inches.This would allow some functionality of the piece as a jewelry chest and allow me to use the wood that I milled. Thickness of the pieces on the original plans called for 3/4", so the thickness for many of the boards for this small desk was just over 1/4".
The case was created with through dovetails at the base and half-blind dovetails for the top. Sliding dovetails hold the drawer dividers to the case. These were cut with a hand saw and a guide block for the socket pin and a hand saw and scratch stock for the tails.When cutting the stopped sockets, it is OK to cut beyond the width needed since these marks will be covered eventually by the side dividers (plus the marks give the piece some authenticity for the period).
One thing that quickly becomes apparent is that precision is crucial when working in a smaller scale since errors tend to be more pronounced. A 1/32" gap is much more apparent at this scale than with a standard sized desk.
 |
| Guide block (Ash) for socket/"pin" for sliding dovetail |
 |
| After cutting the angled grooves with a hand saw, the waste will be removed with a chisel and a router plane. The ideal saw for this work would be a stair saw, but I managed with a dovetail saw. |
 |
| A stair saw. The depth of the blade can be adjusted. The handle in front helps apply pressure more readily for an even cut. |


Comments
Post a Comment